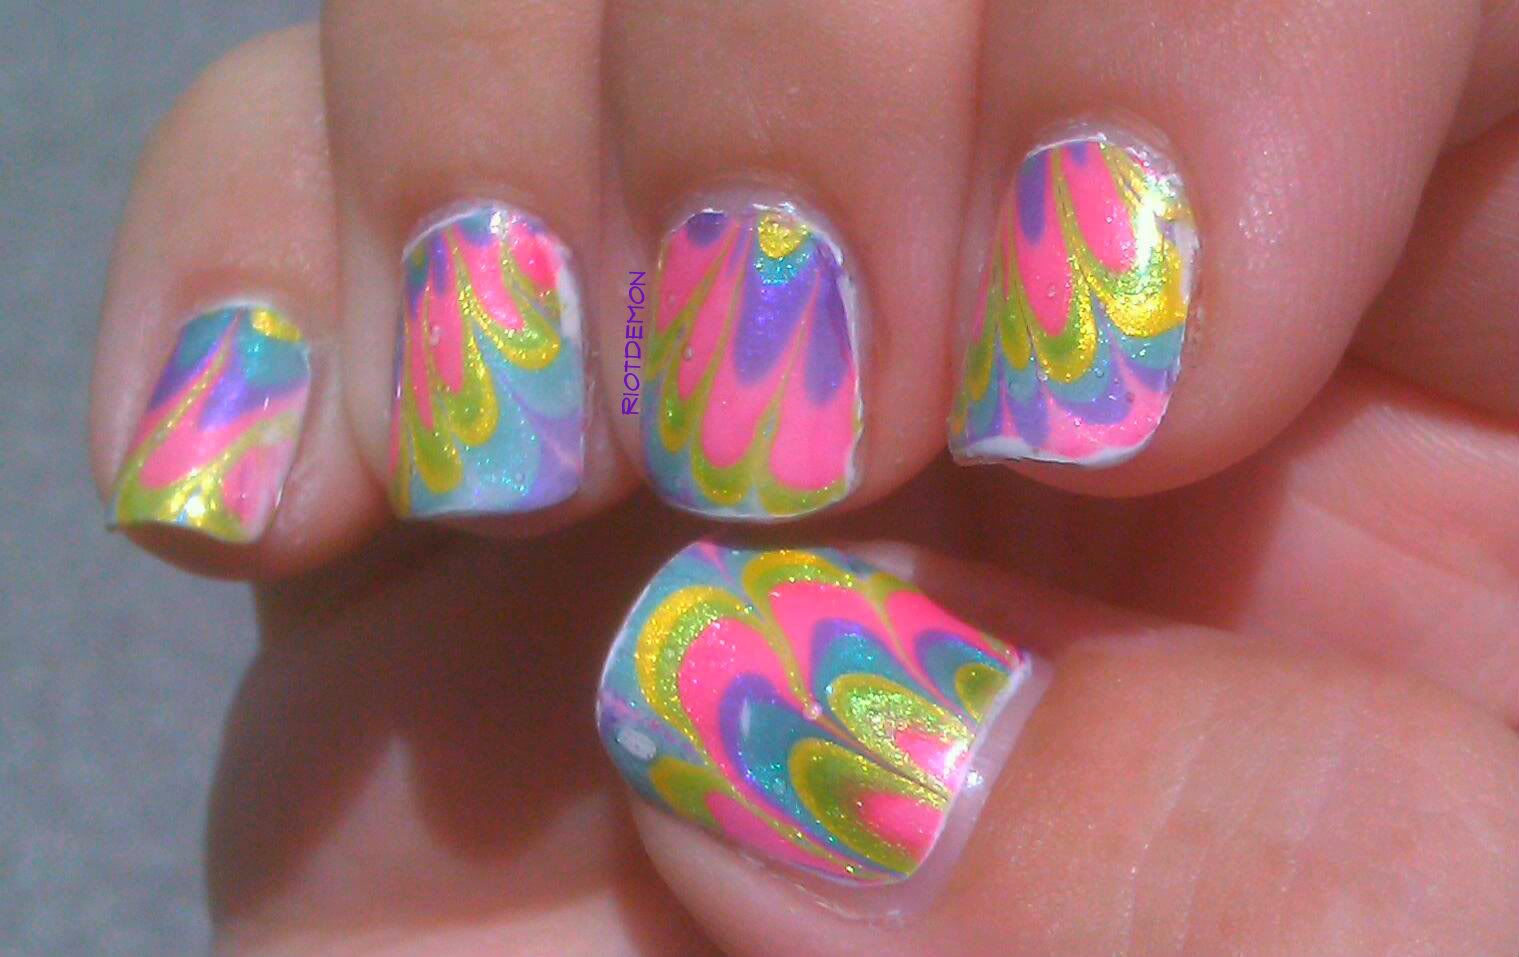
I love water marbles, but they take so much time. There is a lot of trial and error with the polishes to get them to work properly. It is very frustrating, but can be oh so rewarding. I was trying to get some inspiration the other day, so I stood in front of my polish rack. A polished jumped out at me, and then it's 4 siblings came right along. I originally intended to do a dry marble. I did a test on paper that looked interesting. When I tried to do it on my bare nails to test it out however, the polish ran and pooled everywhere. Now I remember why I didn't care for the Sally Hansen HD High Definition line. Pretty colors, but so thin and runny.
These are the 5 colors I used, and in what order.
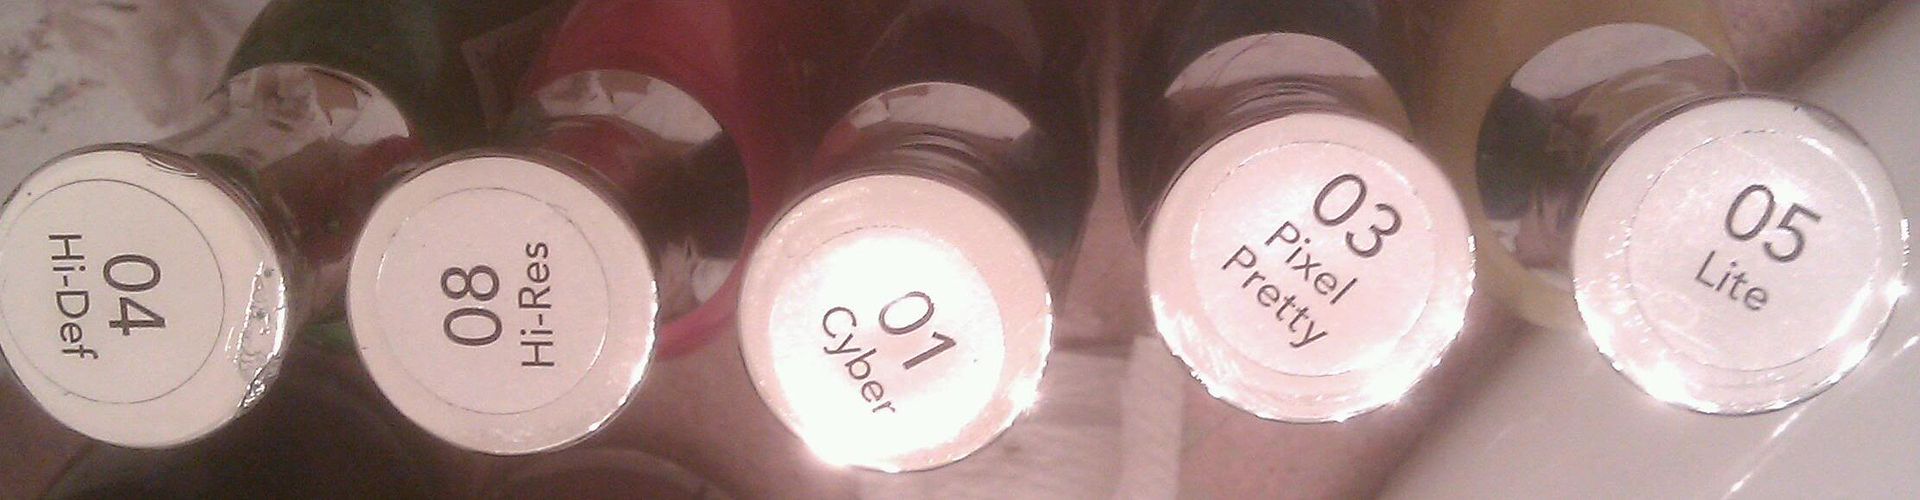
These are the 5 colors I used, and in what order.
I used a white base to make the polishes look more like what they do in the bottle. In the future I might try it again with a silver foil base to bring more of a shimmering quality. I had a few problems with bubbles, but I haven't figured out what was the cause. Maybe different water. One thing I did learn though: Always keep the same exact amount of polish drops in your water! A few nails looked slightly more pastel than neon, and then I realized why. I wasn't cramming as much polish into the glass. I had to do some adjustment on the color to get it fairly close to what it really looks like. I am not that red, Haha.
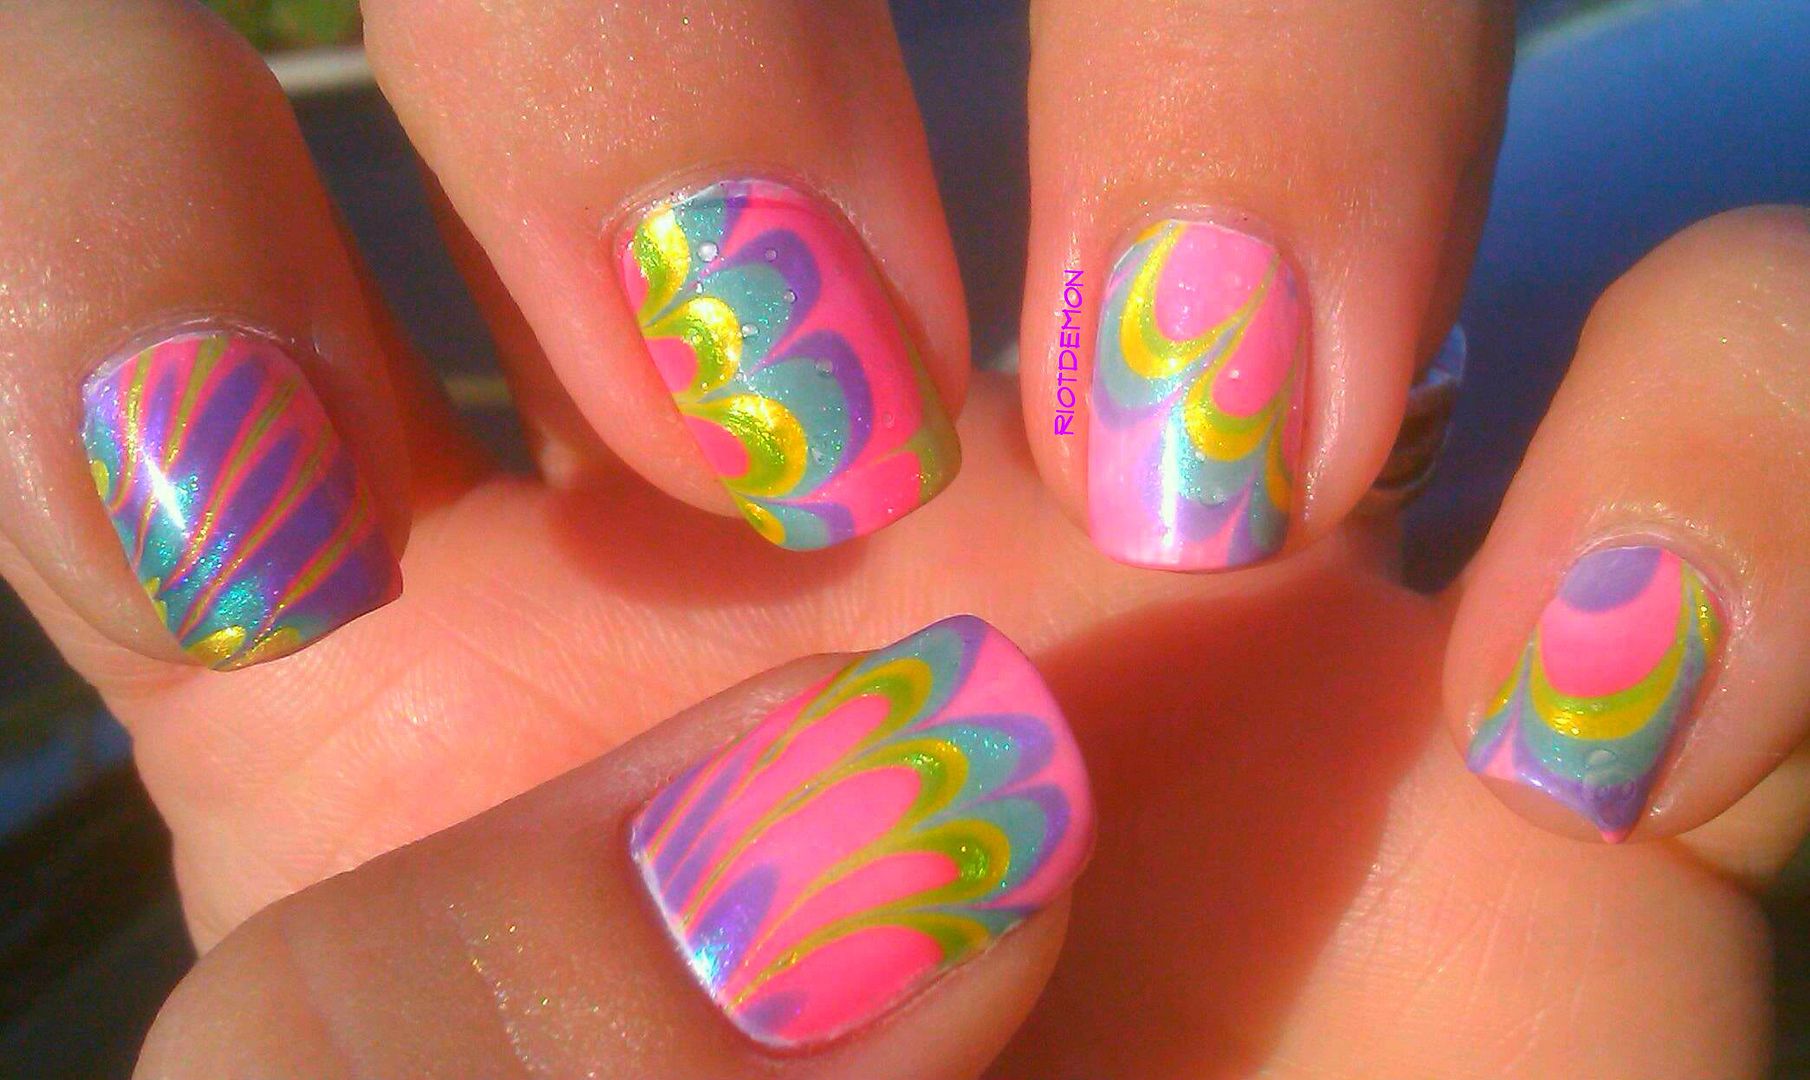
Sorry, I didn't get a good photo of my right hand. This is almost a week later. I am pretty hard on my hands at work, so there is some tip wear. Also, cleaning up with the brush around the cuticles with my left hand is pretty hard. No one cares in person however. They all raved about these nails...